Overview
Demo CNN - Pet Finder Plugin
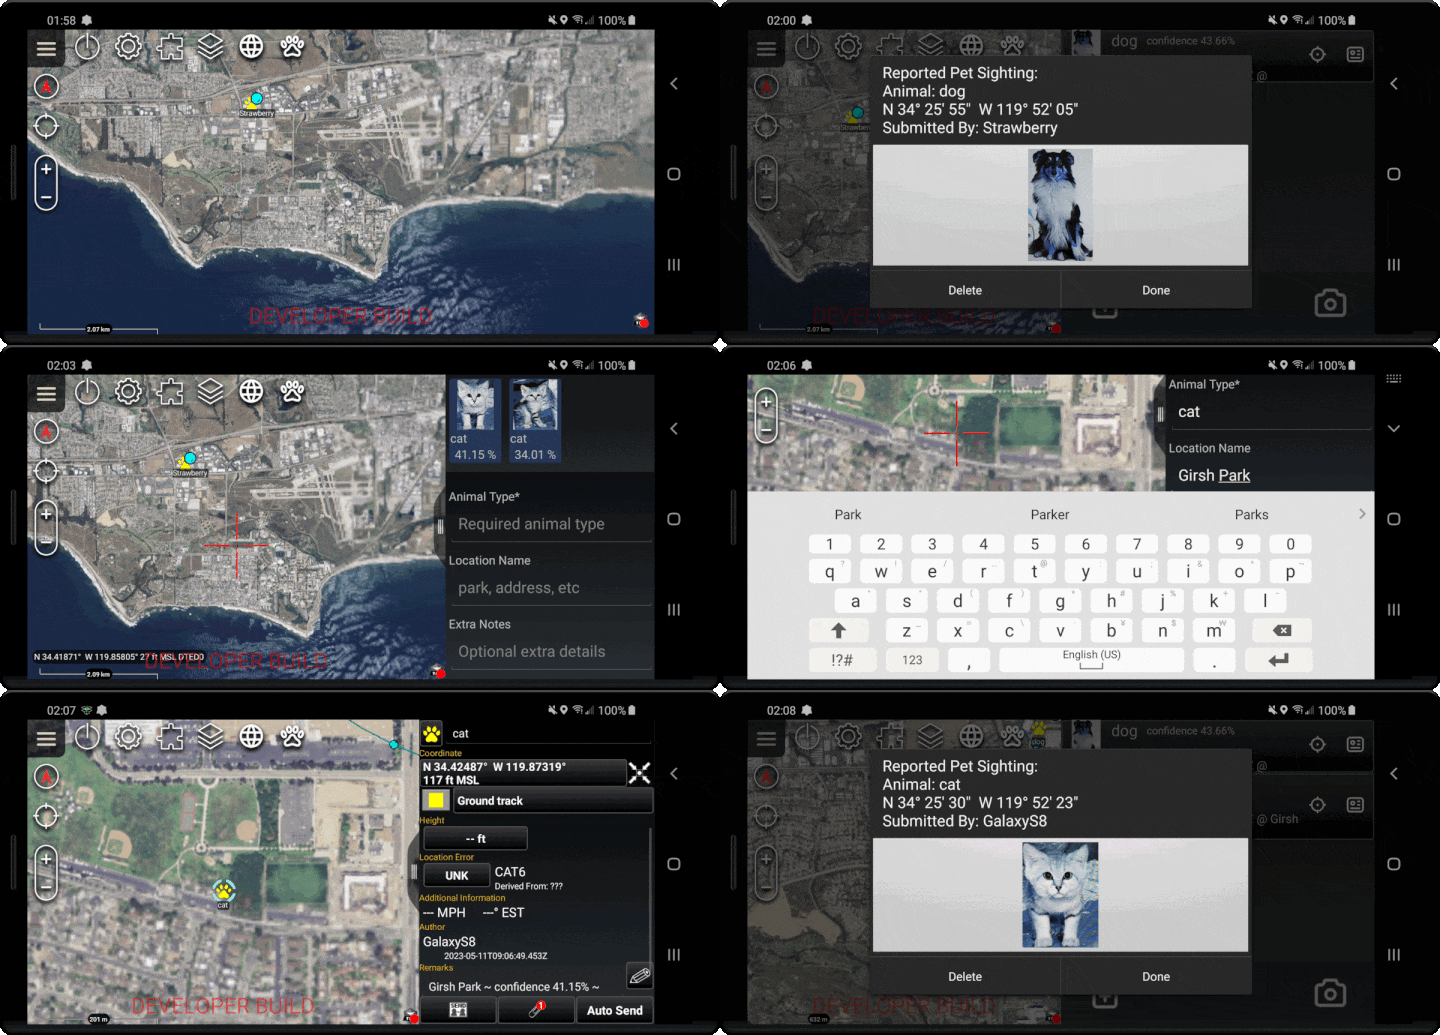
This plugin was developed to demonstrate a realistic application utilizing a Convolutional Neural Network (CNN) to assist in sharing information with a connected TAK community. The goal of this plugin is to introduce how one can integrate a real-time machine learning (ML) model into an ATAK plugin using OpenCV and ncnn. The ncnn library provides us with the necessary tools to convert and process the image pixels with a You Only Look Once (YOLO) model. The Java Native Interface (JNI) methods allow us to utilize the object detection and image classification results within an ATAK plugin. When loaded, the plugin can be found in the ATAK tools as a paw icon as shown in the title. More implementation details can be found in the plugin’s doc folder.

How to build and run this plugin
When building/running this plugin first ensure you have the listed dependencies then proceed to the Quick Reference section. This plugin has the same dependencies as the Camera demonstration so you shouldn’t have to install anything new if you can build and run the camera plugin.
Dependencies
- Click the link above to download CMake.
Windows: advised to download the latest
*.msilink and follow the default options in the installer. Ensure it is included in your environment path. - Restart all terminal sessions and ensure install works. Open up a terminal session and
cmake --version. You should seecmake version 3.23.2or the version you installed as your response. MAY REQUIRE SYSTEM REBOOT. - Ensure you specify your version of CMake in the
cmake_versionvariable of the projectslocal.propertiesfile.
- Click the link above to download CMake.
Windows: advised to download the latest
OpenCV for Android version 4.6.0
Click the link above to download OpenCV version 4.6.0 for Android.
Extract the zip archive to place the contents in:
- Windows:
C:\tak\AndroidLibs\opencv-4.6.0-android-sdk - Linux:
- Windows:
Ensure you specify your install path in the
opencv_dirvariable of the projectslocal.propertiesfile.
- Click the link above to download ncnn build number 20221128 .
- Extract the zip archive to place the contents in:
- Windows:
C:\tak\AndroidLibs\ncnn-20221128-android-vulkan - Linux:
- Windows:
- Ensure you specify your install path in the
ncnn_dirvariable of the projectslocal.propertiesfile.
Click the link above to navigate to the GitHub ninja release page.
Select the latest asset
*.zipdownload (at the time of writing we downloaded v1.11.1)Extract the download to your desired path. The download only has one executable
ninja.exe. We placed the executable atc:\tak\win-ninja\ninja.exe.- Windows: Add
ninja.exeto System Environment Variables. Open Environment Variables window. Find “Path” in the “System variables” view. Select “Edit” then press “New”. Add the complete path to the folder holding your ninja executableC:\tak\win-ninja. - Linux:
- Windows: Add
Ensure install works. Open up a terminal session and enter
ninja --version. You should see1.11.1or the version you installed. MAY REQUIRE SYSTEM REBOOT.
Quick Reference
Build the application signing keys which are required by the Android Operating System (OS) for security when installing software packages. At the bottom of the IDE there should be a Terminal tab you can open to launch a terminal session in the root folder of the plugin.
  # Run the following commands in your Android Studio Terminal
# Generate Debug signing key: set "alias", "keypass", and "storepass" flag values as desired
keytool -genkeypair -dname "CN=Android Debug,O=Android,C=US" -validity 9999 -keystore debug.keystore -alias androiddebugkey -keypass android -storepass android

# Generate Release signing key: set "alias", "keypass", and "storepass" flag values as desired
keytool -genkeypair -dname "CN=Android Release,O=Android,C=US" -validity 9999 -keystore release.keystore -alias androidreleasekey -keypass android -storepass android
Edit the
democnn/local.propertiesfile to add the following lines.<ANDROID_SDK_PATH>and thesdk.dirshould already be filled out by the IDE with the default Android SDK file path. The key here is to specify the paths to your signing keys, OpenCV library, andncnnlibrary. It is also required to specify the CMake version you have installed.<ABSOLUTE_PLUGIN_PATH>should be a complete file path to the root plugin folder; example plugin path:C\:\\tak\\atak-civ-sdk-4.5.1.13\\atak-civ\\plugin-examples\\democnnNOTE: Ensure your directory path is escaped properly on Windows. Follow the default
sdk.dirfor formatting reference or the example path above. The most common mistake is forgetting the first escape characterC\:. Gradle Exceptions will be thrown until your paths are correctly formatted.sdk.dir=<ANDROID_SDK_PATH> takDebugKeyFile=<ABSOLUTE_PLUGIN_PATH>\\debug.keystore takDebugKeyFilePassword=android takDebugKeyAlias=androiddebugkey takDebugKeyPassword=android takReleaseKeyFile=<ABSOLUTE_PLUGIN_PATH>\\release.keystore takReleaseKeyFilePassword=android takReleaseKeyAlias=androidreleasekey takReleaseKeyPassword=android cmake_version=3.23.2 opencv_dir="C:\\tak\\AndroidLibs\\opencv-4.6.0-android-sdk" ncnn_dir="C:\\tak\\AndroidLibs\\ncnn-20221128-android-vulkan"
Logcat Filter
Copy and paste this in the filter field of the Logcat to make it easier to follow the feed of log messages that are printed by the demo camera plugin to help further your understanding of the code in the project.
  # FILTER
tag:MainDropDown tag:ReportDropDown tag:AnimalAdapter tag:Animal
Potential Errors
1. OpenCV not provided
If you see the following stack trace error when trying to build the application there is an issue with your installation of OpenCV.
If you have installed and extracted the library as outlined in the dependencies section it is likely just an issue with the opencv_dir path provided in the local.properties file.
  CMake Error at CMakeLists.txt:6 (find_package):
By not providing "FindOpenCV.cmake" in CMAKE_MODULE_PATH this project has asked CMake to find a package configuration file provided by "OpenCV", but CMake did not find one. Could not find a package configuration file provided by "OpenCV" with any of the following names:
OpenCVConfig.cmake
opencv-config.cmake
Add the installation prefix of "OpenCV" to CMAKE_PREFIX_PATH or set "OpenCV_DIR" to a directory containing one of the above files.  If "OpenCV" provides a separate development package or SDK, be sure it has been installed.
2. CMake Error and Ninja
If you see the following stack trace error when trying to build the application there is an issue with your installation of ninja. First attempt to restart Android Studio to resolve this issue, if that doesn’t work then a complete computer reboot should fix this issue.
CMake Error: CMake was unable to find a build program corresponding to "Ninja". CMAKE_MAKE_PROGRAM is not set. You probably need to select a different build tool.